| Welcome, Guest |
You have to register before you can post on our site.
|
| Forum Statistics |
» Members: 11,972
» Latest member: tomekb
» Forum threads: 4,550
» Forum posts: 49,666
Full Statistics
|
| Latest Threads |
Hello from Germany
Forum: Introduction Area
Last Post: koxaz_nostraz
21:st-Jul-2024, 08:34:11
» Replies: 5
» Views: 5,842
|
Opel OPC Seat Wiring Diag...
Forum: Introduction Area
Last Post: koxaz_nostraz
20:th-Jul-2024, 11:04:11
» Replies: 2
» Views: 1,455
|
Old member returns
Forum: Introduction Area
Last Post: Тania_D
20:th-Jul-2024, 11:03:28
» Replies: 3
» Views: 2,268
|
Oil Temp and pressure sen...
Forum: Retrofit How-to's
Last Post: milozic
16:th-Jun-2024, 16:50:23
» Replies: 4
» Views: 2,214
|
Have you ever thought abo...
Forum: Chris Knott Insurance
Last Post: Rusty2009
21:st-May-2024, 17:22:04
» Replies: 1
» Views: 446
|
Help Please :(
Forum: Astra-J/GTC Technical
Last Post: Rusty2009
16:th-May-2024, 18:49:34
» Replies: 1
» Views: 334
|
Astra remap
Forum: Members car's progress threads
Last Post: Astragtc1282
13:th-May-2024, 17:38:11
» Replies: 0
» Views: 373
|
coolant pipe part number
Forum: Request for information
Last Post: Rusty2009
10:th-May-2024, 17:41:23
» Replies: 1
» Views: 1,406
|
Chirping noise
Forum: Astra-J/GTC Common Problems
Last Post: Rusty2009
7:th-May-2024, 07:34:19
» Replies: 1
» Views: 372
|
VXR front seats
Forum: Wanted
Last Post: Rusty2009
2:nd-Apr-2024, 18:52:29
» Replies: 1
» Views: 1,502
|
|
|
| Knowledge about my grill needed |
|
Posted by: DE5IRED - 19:th-Mar-2015, 14:26:56 - Forum: Astra-J/GTC
- Replies (3)
|
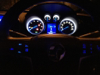 |
Hey guys
I've recently been away and just come back so back to making some changes
With the car.
I made a post not to long ago asking people's thoughts of what method to take to
Get my rear griffin black I've decided to book it in to a body shop as I wanted the easiest
Stress free option and I'm also getting them to do a couple of bits.
First things first I'm getting them to do the rear griffin gloss black and also getting them to colour match the grey plastic on the rear bumper. I was originally going to get a colour matched front grill off ebay but realised it's the same grill I already have so thought it would be best to just get it sprayed whilst having the other bits and pieces done.
I explained to the guy I want the grill colour matched with the car but I want the griffin on the grill sprayed gloss black and possibly the background of the griffin white like the car
He said that would be no problem but it depends if the griffin comes off the front grill I just wondered if anybody knew if it dose come lose off the grill I've tried to slightly prize it forward and it seems like it wants to just wanted to know if anyone could confirm.
Also dose anyone know how easy it Is to remove the front grill as he reckons it will be more in labour if they have to take the front bumper off to get the grill off I thought it was just a case of opening the bonnet and unscrewing it maybe I'm wrong tho.
Apologies for the essay
Gaz
|

|
|
| How-to remove fog surround Facelift |
|
Posted by: Rusty2009 - 19:th-Mar-2015, 08:44:32 - Forum: Exterior How-to's
- Replies (12)
|
 |
![[Image: vx.o.c.jpeg]](http://www.vxoc.org.uk/Images/vxoc%20astra-j-gtc/Logo/vx.o.c.jpeg) How-to remove fog surround Facelift
How-to remove fog surround Facelift
Tools needed
1x trim tool
1x cross head screw driver.
![[Image: 1.JPG]](https://www.vxoc.org.uk/Images/rusty/How-to%20remove%20fog%20surround%20Facelift/1.JPG)
Ok so the first thing we need to do is pop the two covers off that are hiding the screws.
![[Image: 2.JPG]](https://www.vxoc.org.uk/Images/rusty/How-to%20remove%20fog%20surround%20Facelift/2.JPG)
![[Image: 3.JPG]](https://www.vxoc.org.uk/Images/rusty/How-to%20remove%20fog%20surround%20Facelift/3.JPG)
So we shall start with the top one, so grab your trim tool there is a slit which will allow you pop this cover of it's very tight.
![[Image: 4.JPG]](https://www.vxoc.org.uk/Images/rusty/How-to%20remove%20fog%20surround%20Facelift/4.JPG)
Once it popped off so far you then need to pull it towards the back of the car.
![[Image: 5.JPG]](https://www.vxoc.org.uk/Images/rusty/How-to%20remove%20fog%20surround%20Facelift/5.JPG)
![[Image: 6.JPG]](https://www.vxoc.org.uk/Images/rusty/How-to%20remove%20fog%20surround%20Facelift/6.JPG)
Now onto the bottom cover, again there is slit for getting the trim tool in, and you just pull towards you (be careful I broke mine the first time I did it).
![[Image: 7.JPG]](https://www.vxoc.org.uk/Images/rusty/How-to%20remove%20fog%20surround%20Facelift/7.JPG)
![[Image: 8.JPG]](https://www.vxoc.org.uk/Images/rusty/How-to%20remove%20fog%20surround%20Facelift/8.JPG)
Now undo the screws one behind each cover.
![[Image: 9.JPG]](https://www.vxoc.org.uk/Images/rusty/How-to%20remove%20fog%20surround%20Facelift/9.JPG)
Now pull the surround towards you from the grill side (Be warned there is a very flimsy plastic clip here that could break).
![[Image: 10.JPG]](https://www.vxoc.org.uk/Images/rusty/How-to%20remove%20fog%20surround%20Facelift/10.JPG)
Once free then you need to pull the outside towards you.
![[Image: 11.JPG]](https://www.vxoc.org.uk/Images/rusty/How-to%20remove%20fog%20surround%20Facelift/11.JPG)
![[Image: 12.JPG]](https://www.vxoc.org.uk/Images/rusty/How-to%20remove%20fog%20surround%20Facelift/12.JPG)
Now you can change the indicator bulb if needed.
If you want to remove the fog light then undo the 3 screws marked in RED, the one marked green is for adjustment.
![[Image: 13.JPG]](https://www.vxoc.org.uk/Images/rusty/How-to%20remove%20fog%20surround%20Facelift/13.JPG)
|
|
|
|
| How to change fuel filter (diesel cars) |
|
Posted by: grahamfromoldham - 18:th-Mar-2015, 20:51:22 - Forum: Mechanical How-to's
- Replies (32)
|
 |
This is the 'How to' guide showing you how to change your diesel fuel filter. My 'J' Astra is the 2010 1.7cdti and as far as I know, the filter is the same size and location for the 1.3, 1.7 and 2.0 models.
Firstly, always buy a branded filter such as Fram or Mann. I bought the Mann filter from Euro car parts which included two new seals which you will need and it cost me £18.30.
Job time - Estimated 30-45 mins
You will need the following tools:
Jack (I used my trolley jack and axle stands for safety)
Oil tray or similar (to catch about a pint of diesel)
Large flat bladed screwdriver
Rubber gloves
36mm socket or similar. But large pliers may do if you're careful
10mm socket or spanner
*Warning, if using Marigold type gloves as the diesel may cause them to perish within a few minutes of contact with the diesel. I used them and I managed OK.
The photo underneath doesn't show the 10mm spanner or large flat bladed screwdriver (apologies)
![[Image: IMG_20150318_114016227.jpg]](http://i1206.photobucket.com/albums/bb459/grahamfromoldham/IMG_20150318_114016227.jpg)
Chock your front wheels to start with. I only raised one side of the car and one rear wheel was left on the ground, but I always air on the side of caution. I also left the gear in reverse.
![[Image: IMG_20150318_113731025.jpg]](http://i1206.photobucket.com/albums/bb459/grahamfromoldham/IMG_20150318_113731025.jpg)
Firstly, I advise you to disconnect the negative side on the battery as during the filter change you need to disconnect the plug off the filter housing and diesel is present.
![[Image: IMG_20150318_115616783.jpg]](http://i1206.photobucket.com/albums/bb459/grahamfromoldham/IMG_20150318_115616783.jpg)
The filter is located on the drivers side, underneath the car near the rear passenger door, so you need to jack up the car at the rear right hand side.
Jack your car up, preferably with a trolley jack as the jack that comes with the car is likely to get in the way. I used a small piece of wood on my trolley jack to prevent damaging the underside of the car. Behind the jacking point 'slot' in the bodywork is a solid part of the underside of the car with a hole in it. This is the point where to place your trolley jack.
![[Image: IMG_20150318_114624183_HDR.jpg]](http://i1206.photobucket.com/albums/bb459/grahamfromoldham/IMG_20150318_114624183_HDR.jpg)
Once you have jacked up the car high enough, place an axle stand under the axle towards the right hand side. Ideally you should use two axle stands, one at each side but for this minor job where the car is only just off the ground it will be fine.
![[Image: IMG_20150318_114918565.jpg]](http://i1206.photobucket.com/albums/bb459/grahamfromoldham/IMG_20150318_114918565.jpg)
When the axle stand is in place, slowly lower the car onto it then bring the trolley jack to the rear of the car and use the jack to support the axle as well (safety). This will enable you plenty of space to work on the fuel filter.
![[Image: IMG_20150318_115746449.jpg]](http://i1206.photobucket.com/albums/bb459/grahamfromoldham/IMG_20150318_115746449.jpg)
This is the fuel filter housing which shows the 36mm nut in the centre. Within the nut is a slot where you will need your screwdriver the turn the slot to drain the excess diesel off with. I'll explain lower down this guide when to drain it off.
![[Image: IMG_20150318_114930416.jpg]](http://i1206.photobucket.com/albums/bb459/grahamfromoldham/IMG_20150318_114930416.jpg)
Looking from underneath the car, you will see an electrical plug on the filter housing. Place your tray underneath to catch a small amount of diesel during this process.
You need to unclip it and also unclip the two fuel pipes which go into the filter housing. You need to press the blue coloured parts on the clip inwards to release the pipe.
The on nearest the ground is easy, but the top one from the fuel tank is fiddly and took me a good five minutes to unclip it.
![[Image: IMG_20150318_121053709.jpg]](http://i1206.photobucket.com/albums/bb459/grahamfromoldham/IMG_20150318_121053709.jpg)
Next slowly unscrew the slot in the centre of the filter housing until fuel drains out.
![[Image: IMG_20150318_121101929.jpg]](http://i1206.photobucket.com/albums/bb459/grahamfromoldham/IMG_20150318_121101929.jpg)
![[Image: IMG_20150318_121144327.jpg]](http://i1206.photobucket.com/albums/bb459/grahamfromoldham/IMG_20150318_121144327.jpg)
I put the kettle on at this point as it took a few minutes for it to drain off. Expect to lose about a pint of diesel.
Now using your 36mm socket (preferred) or pliers, remove the housing cap. Inside is the old filter. You need to give it a good pull/wiggle to get it out. As you're likely to have diesel on your hands you may need a small pair of pliers to ease it out. Make a mental note which end came out first for when you fit the new filter inside.
![[Image: IMG_20150318_124644828.jpg]](http://i1206.photobucket.com/albums/bb459/grahamfromoldham/IMG_20150318_124644828.jpg)
This is the new filter on the left in comparison to the 12 month old one removed on the right.
![[Image: IMG_20150318_124724438.jpg]](http://i1206.photobucket.com/albums/bb459/grahamfromoldham/IMG_20150318_124724438.jpg)
Next, remove the slotted drain screw from the filter housing cap and replace the rubber washer that should be supplied with the new filter.
![[Image: IMG_20150318_124959903.jpg]](http://i1206.photobucket.com/albums/bb459/grahamfromoldham/IMG_20150318_124959903.jpg)
Also replace the large rubber gasket which seals the cap to the filter housing. Again, a new one should be supplied with the new filter.
![[Image: IMG_20150318_125024781.jpg]](http://i1206.photobucket.com/albums/bb459/grahamfromoldham/IMG_20150318_125024781.jpg)
Now you can insert your new filter and give it a push in for it to fit nice and snug. Replace the cap and tighten it up to 25Nm. Remember to nip up the slotted screw in the centre of the cap. Now re-attach the two pipes ensuring they are clipped back on correctly and plug the electrical plug back in.
Its an idea to dry the area up with an old rag or paper tissue and check for leaks. Now lower your car back on four wheels, connect the negative side of the battery back up and start the car.
Mine started up but as the air came through from the filter change the engine cut out. It then took me about 4 long attempts at starting the car as the fuel was purged through.
In total, it took me just over an hour to do this fuel filter change although it would have been a lot less if I hadn't have had to keep stopping to take photos for this 'How to' guide'. Its the least I can do to give something back to the forum from the knowledge I have gained about the Astra J.
![[Image: IMG_20150318_125707681.jpg]](http://i1206.photobucket.com/albums/bb459/grahamfromoldham/IMG_20150318_125707681.jpg)
|
|
|
|
| Heated Wing Mirrors |
|
Posted by: sheppy1 - 18:th-Mar-2015, 14:05:30 - Forum: Astra-J/GTC
- Replies (2)
|
 |
Hi All,
Been wondering about this for a while but how exactly do the heated wing mirrors work? I've noticed that sometimes they come on but other times they don't...yet I'm not sure what action is required to make them come on...Does anyone know?
Thanks
|
|
|
|
| Problem today with the server |
|
Posted by: tucpal - 17:th-Mar-2015, 10:56:04 - Forum: Site feedback
- Replies (1)
|
 |
There are technical difficulties today 17/03/2015 effecting the forum we hope to resolve this issue tonight tapatalk is still operating correctly
|
|
|
|
|


![[Image: IMG_9918_zpsbjssuxaf.jpg]](http://i1054.photobucket.com/albums/s497/Lewis6317/Astra%20J%201%207%20CDTi/IMG_9918_zpsbjssuxaf.jpg)
![[Image: IMG_9947_zpswdypbgm4.jpg]](http://i1054.photobucket.com/albums/s497/Lewis6317/Astra%20J%201%207%20CDTi/IMG_9947_zpswdypbgm4.jpg)
![[Image: IMG_9944_zpskpssbvn5.jpg]](http://i1054.photobucket.com/albums/s497/Lewis6317/Astra%20J%201%207%20CDTi/IMG_9944_zpskpssbvn5.jpg)
![[Image: IMG_9955_zpsvpqyzrnb.jpg]](http://i1054.photobucket.com/albums/s497/Lewis6317/Astra%20J%201%207%20CDTi/IMG_9955_zpsvpqyzrnb.jpg)
![[Image: IMG_9946_zpsautfwkpz.jpg]](http://i1054.photobucket.com/albums/s497/Lewis6317/Astra%20J%201%207%20CDTi/IMG_9946_zpsautfwkpz.jpg)
![[Image: IMG_9952_zpsuq1jtifr.jpg]](http://i1054.photobucket.com/albums/s497/Lewis6317/Astra%20J%201%207%20CDTi/IMG_9952_zpsuq1jtifr.jpg)
![[Image: IMG_9949_zps2obymxof.jpg]](http://i1054.photobucket.com/albums/s497/Lewis6317/Astra%20J%201%207%20CDTi/IMG_9949_zps2obymxof.jpg)
![[Image: IMG_9950_zpsjfmbf5rk.jpg]](http://i1054.photobucket.com/albums/s497/Lewis6317/Astra%20J%201%207%20CDTi/IMG_9950_zpsjfmbf5rk.jpg)
![[Image: IMG_9943_zpsslfcnnwz.jpg]](http://i1054.photobucket.com/albums/s497/Lewis6317/Astra%20J%201%207%20CDTi/IMG_9943_zpsslfcnnwz.jpg)
![[Image: IMG_9941_zpsmx0dyagv.jpg]](http://i1054.photobucket.com/albums/s497/Lewis6317/Astra%20J%201%207%20CDTi/IMG_9941_zpsmx0dyagv.jpg)
![[Image: IMG_9940_zpsfuqifyuh.jpg]](http://i1054.photobucket.com/albums/s497/Lewis6317/Astra%20J%201%207%20CDTi/IMG_9940_zpsfuqifyuh.jpg)
![[Image: IMG_9959_zpslsu7wkbn.jpg]](http://i1054.photobucket.com/albums/s497/Lewis6317/Astra%20J%201%207%20CDTi/IMG_9959_zpslsu7wkbn.jpg)
![[Image: IMG_9960_zpsc0fpfbsv.jpg]](http://i1054.photobucket.com/albums/s497/Lewis6317/Astra%20J%201%207%20CDTi/IMG_9960_zpsc0fpfbsv.jpg)
![[Image: IMG_9961_zpsoafigwwa.jpg]](http://i1054.photobucket.com/albums/s497/Lewis6317/Astra%20J%201%207%20CDTi/IMG_9961_zpsoafigwwa.jpg)
![[Image: IMG_9957_zpsanpqoziq.jpg]](http://i1054.photobucket.com/albums/s497/Lewis6317/Astra%20J%201%207%20CDTi/IMG_9957_zpsanpqoziq.jpg)
![[Image: IMG_20150318_114016227.jpg]](http://s1206.photobucket.com/user/grahamfromoldham/media/IMG_20150318_114016227.jpg.html)
![[Image: IMG_20150318_113731025.jpg]](http://s1206.photobucket.com/user/grahamfromoldham/media/IMG_20150318_113731025.jpg.html)
![[Image: IMG_20150318_115616783.jpg]](http://s1206.photobucket.com/user/grahamfromoldham/media/IMG_20150318_115616783.jpg.html)
![[Image: IMG_20150318_114624183_HDR.jpg]](http://s1206.photobucket.com/user/grahamfromoldham/media/IMG_20150318_114624183_HDR.jpg.html)
![[Image: IMG_20150318_114918565.jpg]](http://s1206.photobucket.com/user/grahamfromoldham/media/IMG_20150318_114918565.jpg.html)
![[Image: IMG_20150318_115746449.jpg]](http://s1206.photobucket.com/user/grahamfromoldham/media/IMG_20150318_115746449.jpg.html)
![[Image: IMG_20150318_114930416.jpg]](http://s1206.photobucket.com/user/grahamfromoldham/media/IMG_20150318_114930416.jpg.html)
![[Image: IMG_20150318_121053709.jpg]](http://s1206.photobucket.com/user/grahamfromoldham/media/IMG_20150318_121053709.jpg.html)
![[Image: IMG_20150318_121101929.jpg]](http://s1206.photobucket.com/user/grahamfromoldham/media/IMG_20150318_121101929.jpg.html)
![[Image: IMG_20150318_121144327.jpg]](http://s1206.photobucket.com/user/grahamfromoldham/media/IMG_20150318_121144327.jpg.html)
![[Image: IMG_20150318_124644828.jpg]](http://s1206.photobucket.com/user/grahamfromoldham/media/IMG_20150318_124644828.jpg.html)
![[Image: IMG_20150318_124724438.jpg]](http://s1206.photobucket.com/user/grahamfromoldham/media/IMG_20150318_124724438.jpg.html)
![[Image: IMG_20150318_124959903.jpg]](http://s1206.photobucket.com/user/grahamfromoldham/media/IMG_20150318_124959903.jpg.html)
![[Image: IMG_20150318_125024781.jpg]](http://s1206.photobucket.com/user/grahamfromoldham/media/IMG_20150318_125024781.jpg.html)
![[Image: IMG_20150318_125707681.jpg]](http://s1206.photobucket.com/user/grahamfromoldham/media/IMG_20150318_125707681.jpg.html)
